

Reviewing a Candidate
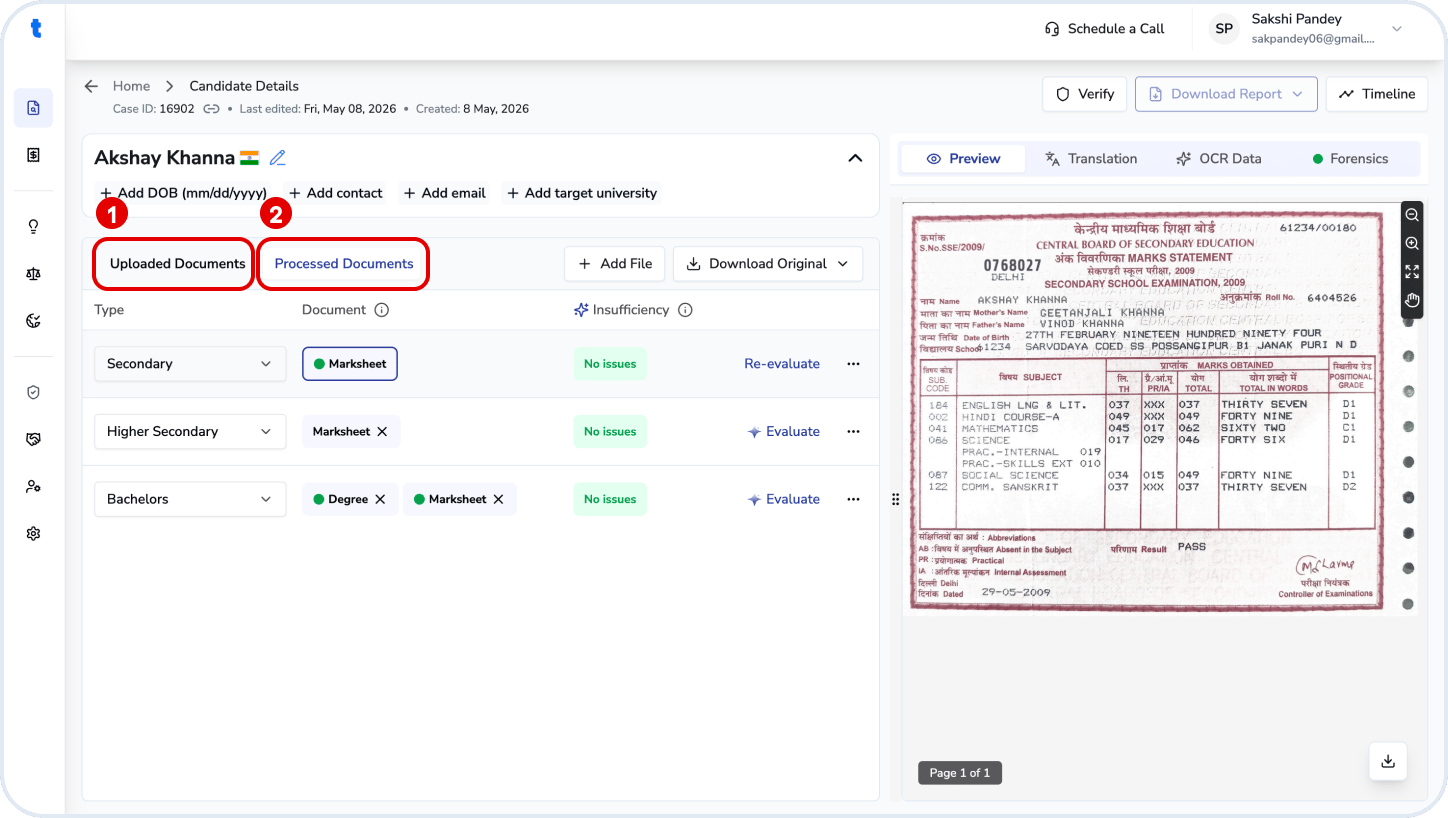
Click a candidate in the Evaluations page to open their profile. This page includes:- Candidate details (extracted from documents)
- Documents (uploaded and processed)
- File preview (raw and translated)
Candidate Details
Basic details such as Full Name, Date of Birth, Email, and Contact Number are auto-extracted where possible.- Full Name is required to proceed. Enter it manually if missing.
- Other fields are optional and can be edited at any time.
Documents
Documents are organized into two tabs:- Uploaded
- View processing status
- Preview or download original files
- Processed
Documents are structured using two levels:
- Broad categories (e.g., Bachelor, Master, High School, Identity, Miscellaneous)
- Granular types (e.g., marksheet, degree, passport)
- Flag issues using Insufficiency (see Insufficiencies)
- Click Evaluate/View to open transcript evaluation
- Select a document to view its preview
Preview Panel
The right panel shows a preview of the selected document. You can also:- Click Forensics to view the fraud detection report
- Select OCR to view the translated, digitized version (download via the blue icon)
- Access the Timeline of changes to the case file
- Download evaluation and verification reports via Download Reports
Actions
- Add documents → Use Add Documents or “+” to upload files
- Delete documents → Use “x” (single file) or “…” (entire group)
- Verify documents → Start from Verify Documents action
How to add more documents?
You can upload additional documents to an existing candidate at any stage before completing the evaluation. Newly uploaded documents will be added to the candidate’s record and can be reviewed, extracted, and evaluated as needed.Step 1: Open the candidate details
Navigate to Manage Cases (Home) and select the candidate you want to update.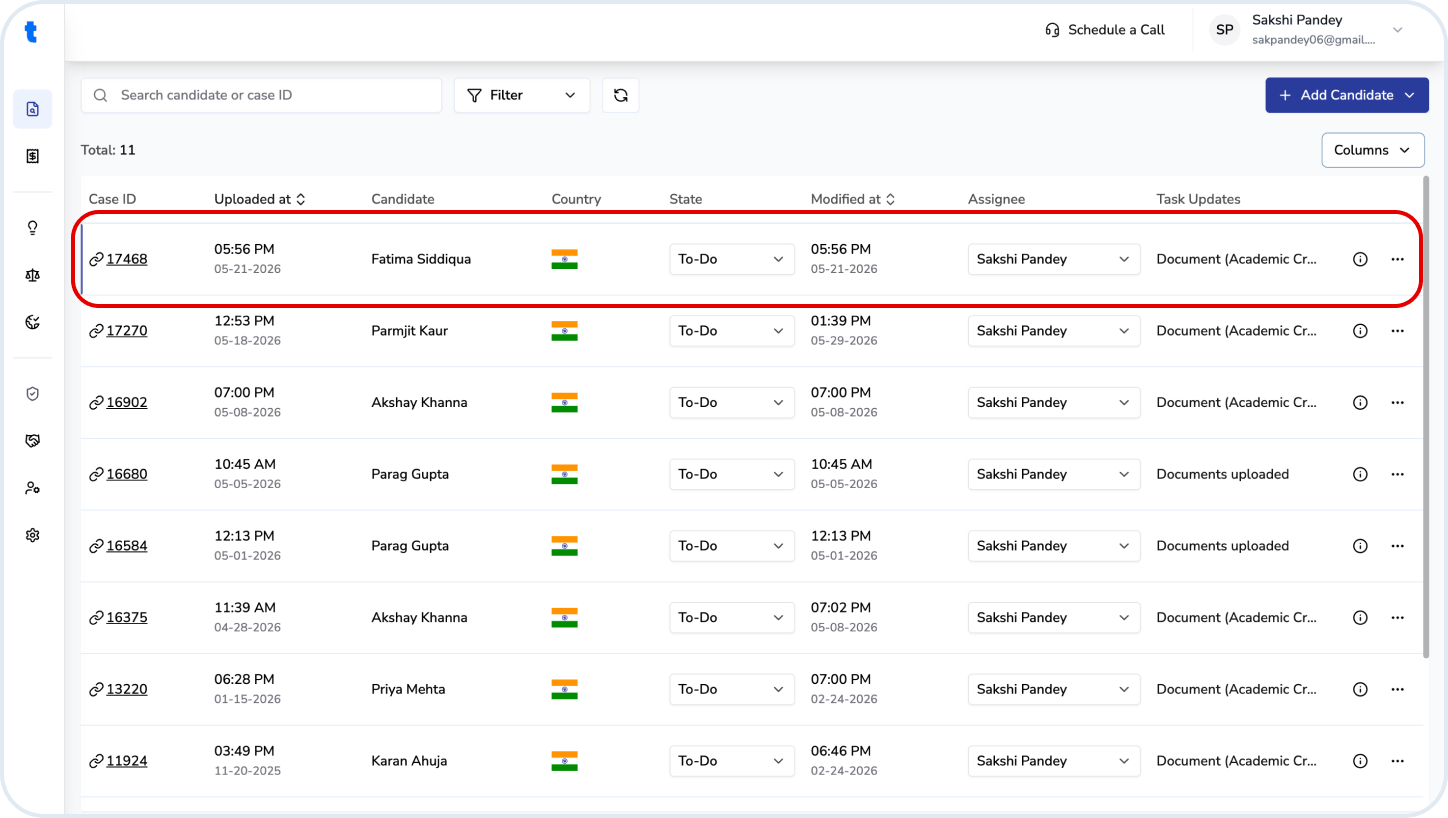
Step 2: Go to Documents
From the Candidate Details page, open the Documents section.Step 3: Upload additional documents
Click the Add files button and select the files you want to add.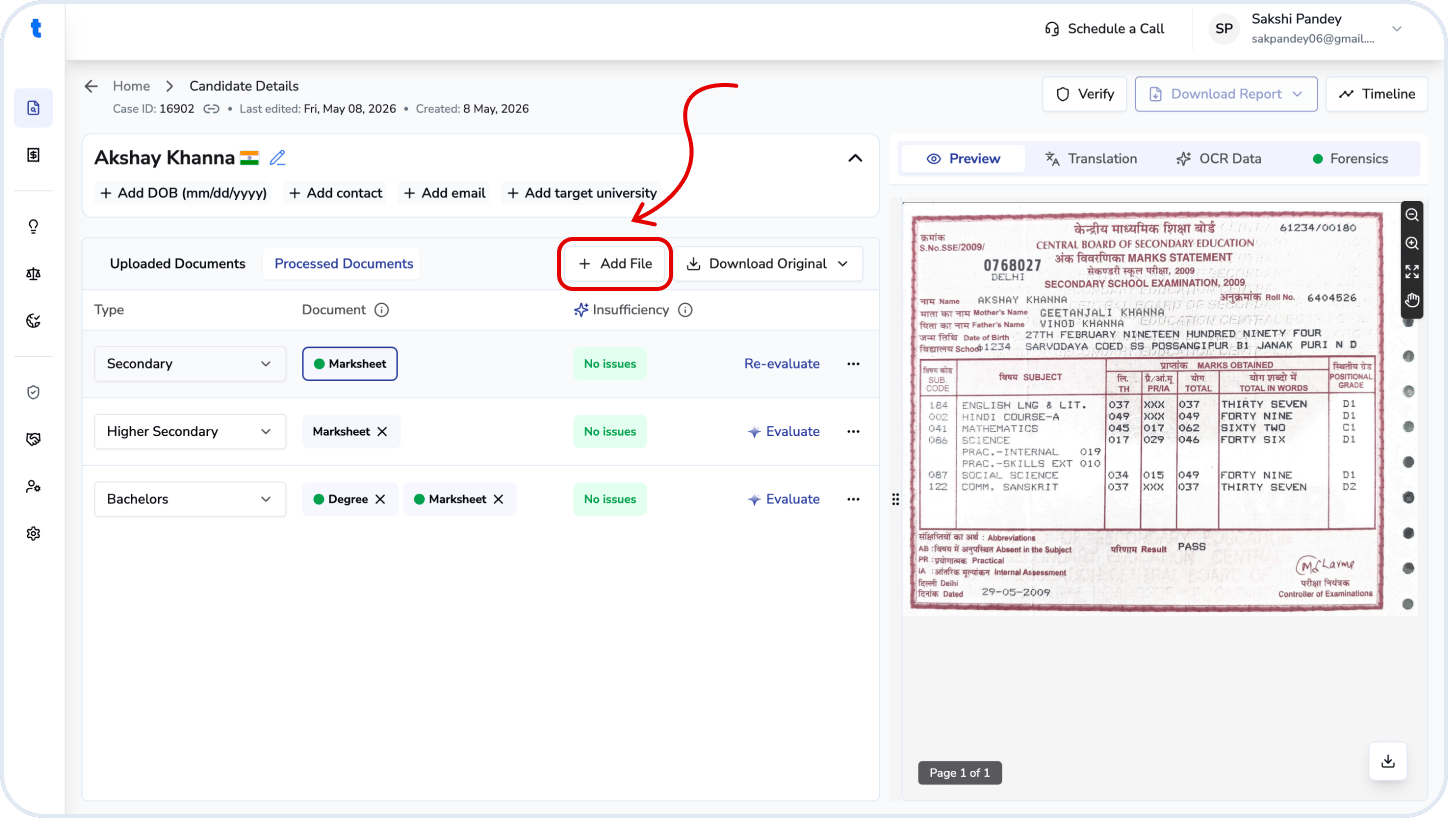
- Degree certificates
- Mark sheets / transcripts
- Supporting academic documents
- Letters of Authorization (LoA)
- Other documents
Step 4: Review uploaded documents
Once uploaded, the documents will appear in the document list and become available for extraction, translation, forensics, and evaluation workflows.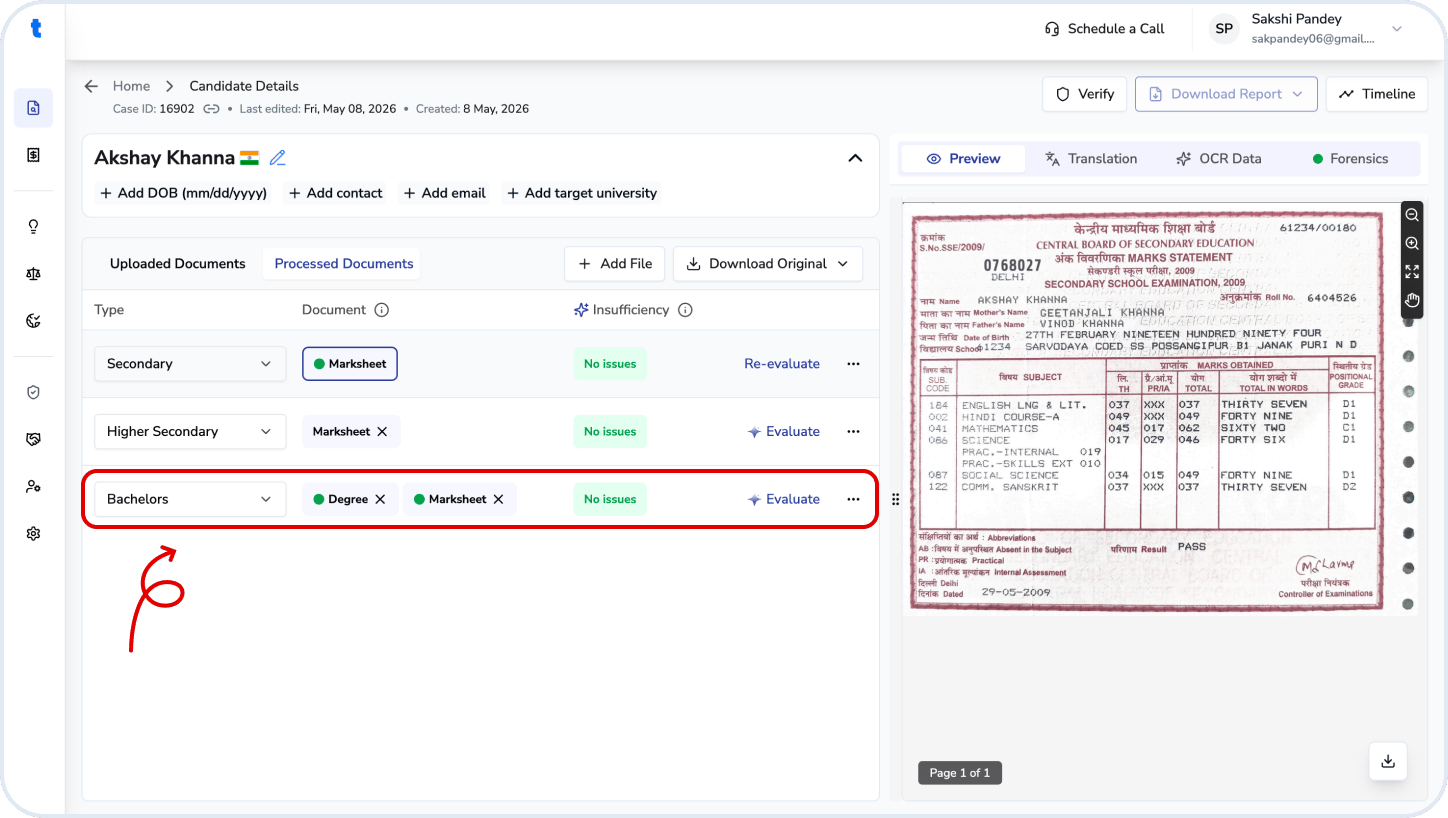
If you’ve already completed an evaluation, review the newly uploaded documents before generating or downloading a final report.
Related questions
How to get a translated copy?
How to get a translated copy?
Open the candidate details page and navigate to the OCR data & Digitized copy tab. Once the translation is complete, you can review and download the translated version of the document.
How to download forensics report?
How to download forensics report?
Open the candidate details page and go to the Forensics tab. Click the Download Report icon at the bottom to export the forensic analysis and findings.
How to view timeline of any activity that has happened for the candidate?
How to view timeline of any activity that has happened for the candidate?
Open the candidate details page and select the Timeline tab at the top right. Here, you can view all actions, updates, evaluations, and document-related activities associated with the candidate.
Can I edit candidate's personal details?
Can I edit candidate's personal details?
Yes. Open the candidate details page, click Edit Details, update the candidate’s name or other details, and save your changes.
Can I change the education level?
Can I change the education level?
Yes. Navigate to the relevant education level row, click and open the dropdown, then update the education level before proceeding with evaluation.
How to initiate a Verification from the evaluation portal?
How to initiate a Verification from the evaluation portal?
Open the candidate details page and click the Verify button from the evaluation workflow. Select the required verification type and submit the request to begin the verification process.